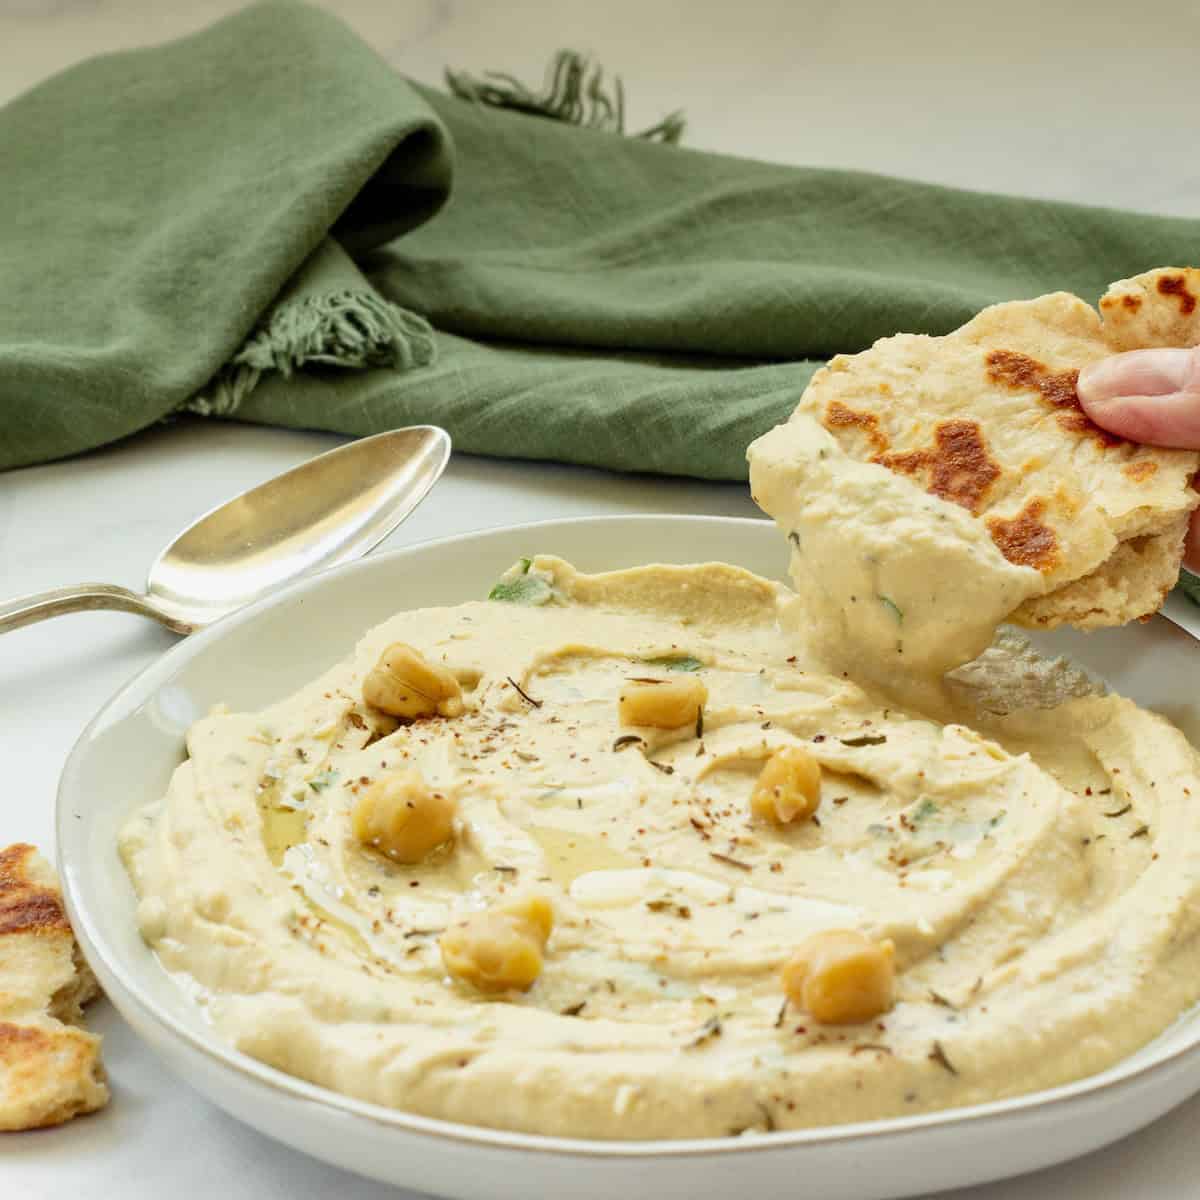
Whipped Homemade Hummus (Freezer-Friendly)
Hummus is a classic Mediterranean food. While store brands are great in a pinch, once you taste this light, creamy homemade hummus, you’ll never look at packaged hummus the same way again. This recipe freezes beautifully, so I always keep a few containers in my freezer.
Like many traditional hummus recipes, this one uses canned chickpeas, tahini, lemon, and garlic, but a special technique ensures the smoothest, creamiest hummus imaginable. Keep reading to learn about it!
Why You’ll Love This Recipe
- Hummus is such a versatile Mediterranean diet dish. You can eat it as a snack, spread it on bread or sandwiches, or use it as a flavor-enhancing ingredient and stir it into other recipes.
- It’s seriously the best-tasting, smoothest hummus ever, and it’s very easy to make.
- You can play with the seasonings to add more or less of the flavors you like so you can make your own signature hummus.
- This recipe makes a generous two cups, and it’s freezer-friendly, so you can always have fresh hummus on hand.
Recipe Ingredients
Here are the main ingredients needed to make homemade hummus. I’ve listed a few substitutions and variations in the section below.
Be sure to check out the recipe card below for the complete list of ingredients with measurements.

Chickpeas. Use low-sodium canned chickpeas (also called garbanzo beans).
Baking soda. Just ½ teaspoon helps to soften the chickpeas as you boil them.
Tahini. This is sesame paste or ground sesame seeds, and it’s a classic ingredient in hummus. Look for it in the peanut butter aisle.
Garlic. You can use fresh garlic, but I usually use garlic powder because it has a milder flavor and it blends well.
Lemon juice. Only use freshly squeezed lemon juice here.
Za’atar. This Middle Eastern spice blend usually includes oregano, thyme, marjoram, sumac, and sesame seeds. It’s readily available in the spice section.
Substitutions and Variations
- Substitute cashew, peanut, or sunflower butter for the tahini. Make sure you buy an unsweetened brand, or you’ll end up with sweet hummus, which is weird.
- For a Southwest flavor, use cilantro and cumin instead of parsley and za’atar.
- For green hummus, add a handful of baby spinach while processing it.
- Add a tablespoon of minced sun-dried tomatoes or some roasted red pepper for a flavor variation.
Step-By-Step Instructions
1. Boil the chickpeas. After about 20 minutes, they’ll become super soft, and some will float to the top. The skins will also separate from the beans and float to the top of the pot.

2. Rinse the chickpeas to remove the skins. Transfer them between a strainer and a pot of fresh water several times. Each time they’re in the water, use your fingers to scoop out the skins that float to the top. Strain and scoop in the sink so you can easily dispose of the skins.
3. Combine the hummus ingredients. Add the cooked, skinned chickpeas, tahini, lemon juice, olive oil, garlic powder, za’atar, and 1/4 cup of water to the food processor. Process for about 45 seconds, scraping down the sides once or twice.

4. Process everything until it’s creamy. Taste the hummus, and add salt and any additional seasoning (lemon, garlic powder, za’atar, parsley) as needed. Check for creaminess and add one tablespoon of water at a time until the hummus is super creamy. Add the parsley last and pulse a few times to chop it well.
Expert Tips
Boiling the chickpeas with baking soda softens them and releases the chickpea skins. Rinse them several times in fresh water and scoop out as much of the skins as possible. This is the key to getting a velvety smooth, creamy texture.
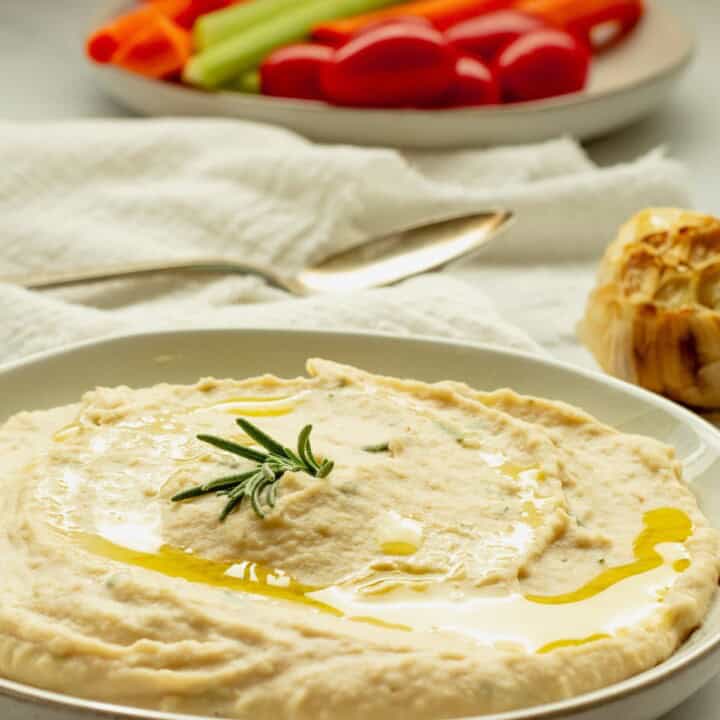
This hummus is amazing when served warm, so try to serve it immediately after making it.
If you refrigerate it, the hummus will thicken up. Add a few tablespoons of water to thin it to the desired consistency. You can also warm it for 20 seconds in the microwave before serving. Stir it well to distribute any hot spots.
Once I make a batch, I transfer about 2/3 of the recipe into smaller containers and freeze them. They will keep for at least three months. Give it a good stir and add a little bit of water to restore the creamy, light consistency.

How to Eat Homemade Hummus
So many ways!
- I recommend using hummus instead of mayo when making chicken or tuna salad. I use it in my Mediterranean tuna stuffed peppers.
- Add a tablespoon or two to turn homemade vinaigrette dressing into a creamy Ceasar-like dressing.
- Spread it on seed crackers, pita bread, or focaccia bread for an appetizer.
- Dip all the vegetables into it.
- Spread it on your chopped Italian sandwich.
- Stir it into my roasted red pepper and tomato soup for a creamy soup without cream.
Recipe FAQs
Store this in a tightly covered container in the refrigerator for up to four days. If you don’t think you’ll eat the entire recipe (it makes a lot), see below for freezing instructions.
Yes, this homemade hummus freezes beautifully. Divide it into small containers, cover tightly, and freeze for up to three months. Let it thaw in the refrigerator. Once thawed, add a few tablespoons of water as needed to thin it, and warm it for 20 seconds in the microwave if you like warm hummus.
A 1/4 cup serving of this hummus has about 12 grams of protein. It’s higher in carbohydrates than protein, but six grams of those carbohydrates come from fiber.
Other Creamy Party Dips and Spreads

Love this recipe? Please leave a 5-star rating on the recipe card below & a review in the comments section further down the page. Your email will not appear publicly!

Whipped, Creamy Homemade Hummus
Equipment
- food processor
Ingredients
- 30 ounces low sodium chickpeas 2 cans, rinsed and drained
- 1/2 teaspoon baking soda
- 1/2 cup tahini
- 3 tablespoons fresh lemon juice
- 2 tablespoons olive oil
- 1/2 teaspoon garlic powder
- 1/2 teaspoon za'atar Mediterranean spice blend
- 1/2 teaspoon Kosher salt
- 1/4 cup lightly packed fresh parsley
Instructions
- Place the chickpeas and baking soda in a large saucepan and add enough water to cover the chickpeas by at least two inches. Stir and bring it to a boil, then cover, reduce the heat, and let the chickpeas simmer for about 20 minutes or until some of them and the skins are floating at the top.
- Drain the chickpeas and rinse well with cold water. Put them back in the saucepan, fill it with water, and using your hand or a slotted spoon (hand is easiest) scoop out as many of the chickpea skins as you can.Repeat the straining and scooping about four times or until you've removed most of the skins.
- Add the skinned chickpeas, 1/4 cup of water, tahini, lemon juice, olive oil, garlic powder, za'atar, and salt to a food processor bowl. Cover and process for about 45 seconds, scraping down the sides once or twice.
- Taste the hummus, and add salt or other seasonings as needed. If the hummus is too thick, add more water, one tablespoon at a time. When the hummus is smooth and the consistency is right, add the parsley and pulse about 10 times.
Notes
Nutrition
If you print this recipe, you can scan the QR code below to see updates and tips or leave a comment.
This is worth every minute of taking the shells off the chickpeas! A delightfully easy recipe that allows me to control what goes into my food.
It is fresh and light. The parsley and lemon are light while the za’atar gives it an earthy note.
This will be a repeat recipe. Thank for sharing!
Thank you so much for your nice review! I’m glad you love it!
This is so creamy and delicious! I can’t go back to packaged hummus.
This is the loveliest hummus I have ever made or eaten! Taking the skins off the chickpeas is a mindful little chore that really makes the texture so smooth. Very worthwhile doing this! My homegrown parley gave the dip a subtle green tint…..pretty.
Thanks for trying it Kerry! Yes it is a bit of work but SO worth it once you taste the results. I always divide and freeze a few portions for later so I only have to make it monthly.